
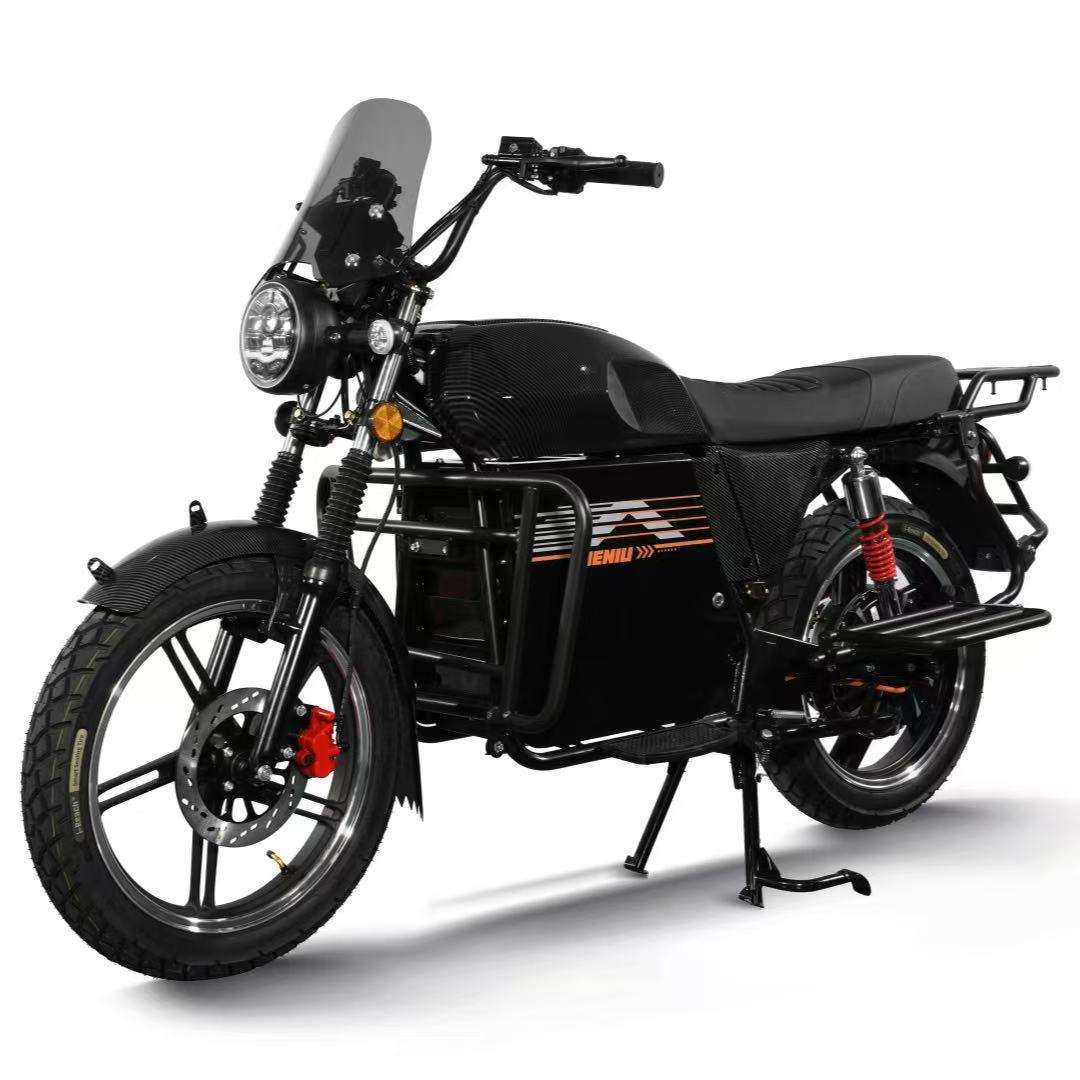
Top 5 Reasons to Choose a Retro Electric Motorcycle in 2026
Style, Power, and Practicality All in One
In 2026, electric motorcycles are no longer just a trend—they’re a smart choice for daily commuters, delivery riders, and anyone who wants a reliable, eco-friendly ride.But if you want to stand out while enjoying modern performance, a retro electric motorcycle is the perfect balance of classic design and cutting-edge technology.Here are the top 5 reasons you should choose one this year.
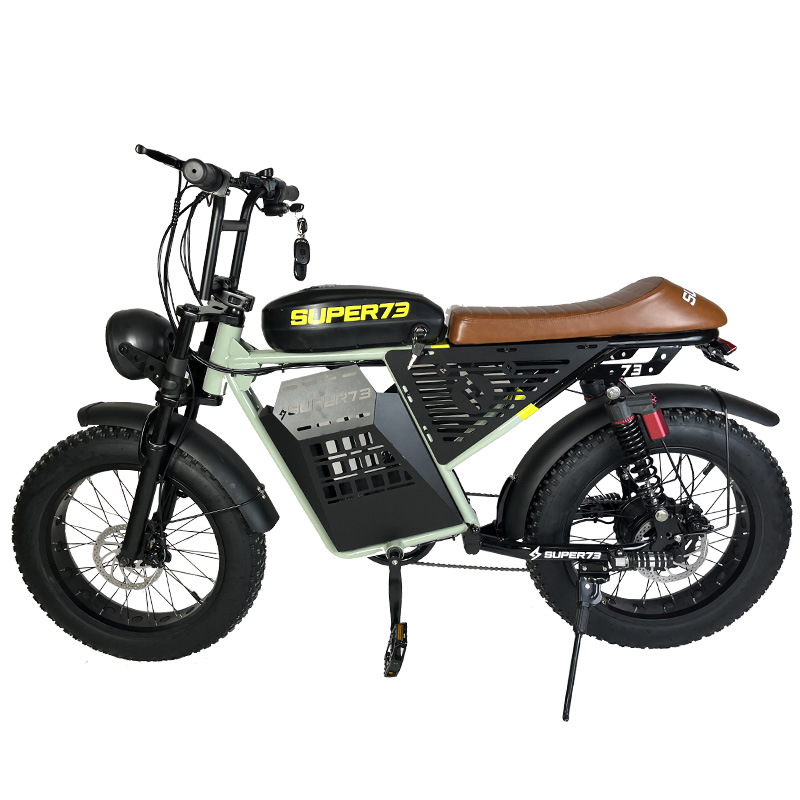
1. Timeless Retro Style That Never Goes Out of Fashion
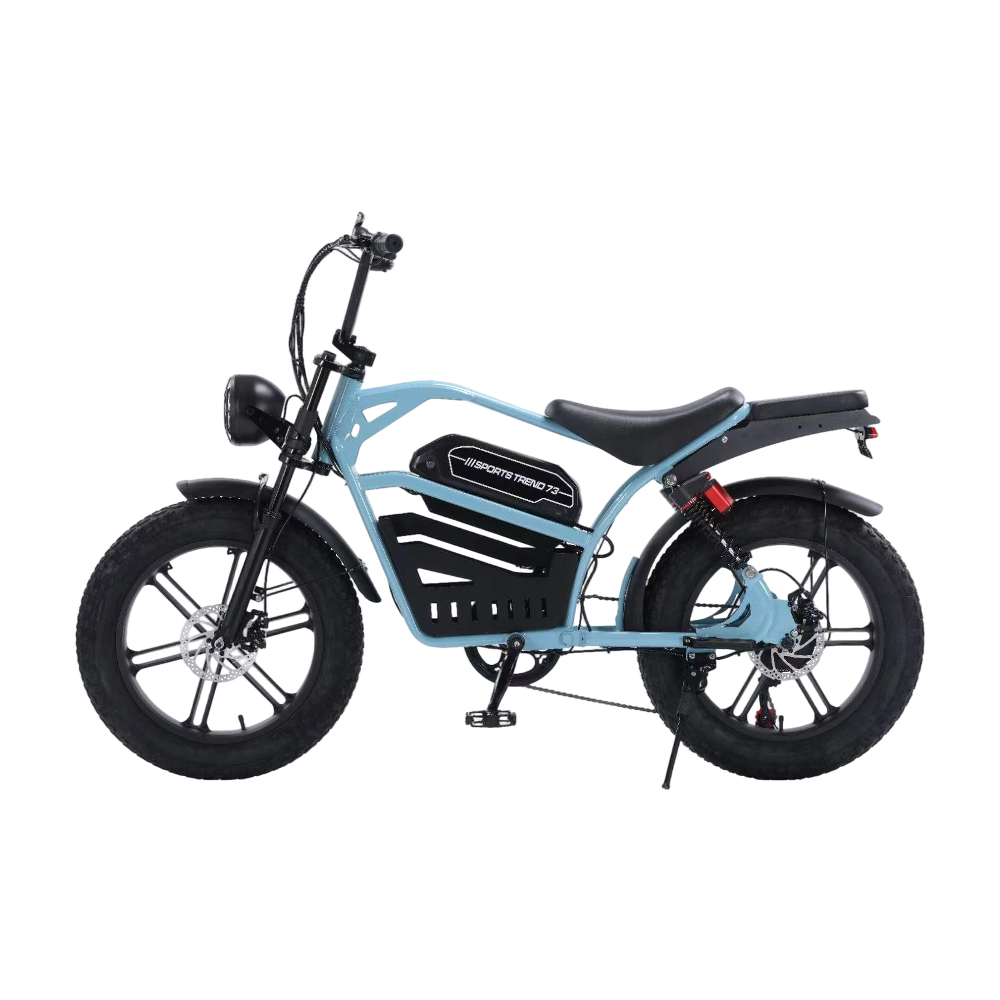
Retro design is always in style.Unlike regular scooters or modern-looking e-bikes, a retro electric motorcycle has a classic, attractive appearance that turns heads on the street.
Smooth, vintage-inspired body lines
Classic fuel-tank shape (now used as a battery compartment)
High-quality finish that looks premium and durable
Whether you’re riding to work, meeting friends, or running deliveries, you’ll look stylish while doing it.
2. Powerful 3000W Motor for Real-World Performance
Don’t let the classic look fool you.Our retro electric motorcycle is built for serious performance:
3000W Quanshun high-efficiency motor
Max speed up to 85km/h
Strong acceleration for city traffic
Stable power even with heavy loads
It has the soul of a vintage motorcycle and the power of a modern electric vehicle.
3. Stable & Safe Riding for Daily Use
Safety and stability are built into every part:
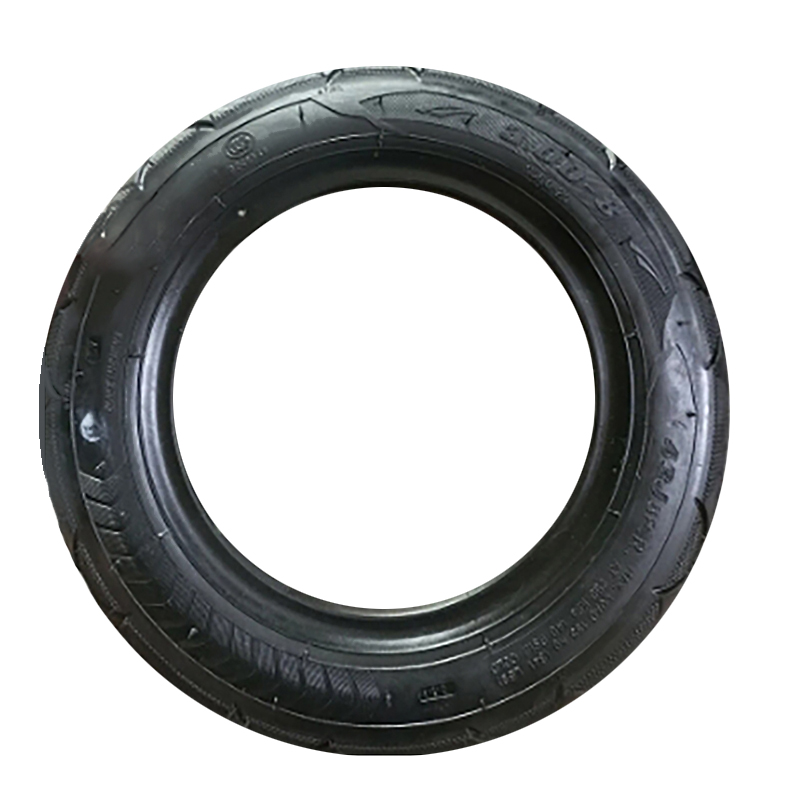
17-inch wheels: Front 90/90-17, Rear 110/80-17
Front and rear disc brakes for strong, reliable stopping power
Large bumpers for extra protection
Stable frame design for rough city roads
This makes it great for:
Daily commuting
Delivery services
Long hours of riding
4. Flexible Battery Options for Long Range
One of the biggest advantages in 2026 is battery flexibility.Our retro e-motorcycle supports:
60V/72V-20Ah standard battery
72V 100Ah lithium iron phosphate battery
72V 165Ah ternary lithium battery
With the high-capacity battery, you can ride all day without worrying about range.That’s perfect for full-time delivery riders and long-distance commuters.
5. Modern Features Inside a Classic Body
You get vintage style plus modern convenience:
3-speed adjustment (Eco, Normal, Sport)
Built-in Bluetooth speaker for music and calls
100A high-performance controller
Comfortable seating for long rides
Low maintenance compared to gas motorcycles
You don’t have to choose between style and function—you get both.
Conclusion: Why Choose a Retro Electric Motorcycle in 2026?
A retro electric motorcycle gives you:
Eye-catching classic design
3000W powerful performance
Stable, safe riding
Long-range battery choices
Modern smart features
It’s ideal for commuters, delivery riders, small business owners, and anyone who wants a stylish, reliable, and eco-friendly ride.
If you’re looking for an electric motorcycle that looks great, performs even better, and fits your daily life,a retro electric motorcycle is the best choice for 2026.
72V vs 60V Electric Motorcycle: Which Battery Should You Choose?
1. Core Difference: Voltage = Power & Performance
At the heart of your electric motorcycle, voltage directly impacts power, speed, and efficiency. Here’s the key breakdown:
| Feature | 60V System | 72V System |
|---|---|---|
| Power Output | Typically 1500W–2500W motors | Ideal for 2000W–3000W+ motors (like our 3000W Quanshun model) |
| Top Speed | 50–70km/h | 70–85km/h (matches our bike’s 85km/h max speed) |
| Acceleration | Smooth, suitable for light loads | Stronger torque, faster takeoff for heavy cargo |
| Battery Size Range | 20Ah–50Ah | 20Ah–165Ah (supports long-range delivery shifts) |
2. When to Choose a 60V Battery
- Short urban commutes (under 50km/day): Ideal for riders who only need to get to work or run errands.
- Budget-conscious buyers: 60V batteries and controllers are generally cheaper upfront.
- Low-load scenarios: Carrying small items or riding on flat terrain with minimal hills.
- Our bike compatibility: Our model supports 60V/72V-20Ah as a standard option, great for casual riders.
- Lower initial cost
- Lighter weight (improves maneuverability for new riders)
- Sufficient for daily short trips
- Simpler charging infrastructure (compatible with standard household outlets)
- Limited top speed and hill-climbing ability
- Shorter range with larger battery options
- Less ideal for heavy delivery loads
3. When to Choose a 72V Battery
- Delivery fleets: Our 3000W motor paired with a 72V battery delivers the power to carry heavy orders and meet tight deadlines.
- Long-distance riders: 72V 100Ah LiFePO4 or 165Ah ternary lithium batteries offer up to 150–200km of range—perfect for full-day shifts.
- Hilly terrain: Higher voltage means better torque for climbing steep roads without losing speed.
- High-speed commuting: Reaches our bike’s max 85km/h, keeping up with city and suburban traffic.
- Matches our 3000W motor’s full performance potential
- Supports long-range battery upgrades (100Ah/165Ah)
- Better acceleration and hill-climbing for heavy loads
- Future-proof for extended delivery routes
- Higher upfront cost for batteries and components
- Slightly heavier weight (offset by improved performance and range)
- Longer charging times for large-capacity batteries (8–12 hours for 165Ah)
4. Our Bike’s Flexible Battery Compatibility
- Standard setup: 60V/72V-20Ah battery – great for casual riders or short delivery routes (40–60km range).
- Long-range upgrade 1: 72V 100Ah LiFePO4 battery – ideal for 8-hour delivery shifts (100–120km range).
- Long-range upgrade 2: 72V 165Ah ternary lithium battery – maximum range for full-day business use (150–200km range).
5. Key Factors to Consider Before Choosing
- Daily range needs: If you ride >60km/day, 72V is the better choice.
- Load weight: Delivery riders carrying heavy orders should prioritize 72V for consistent performance.
- Terrain: Hilly areas demand the extra torque of a 72V system.
- Budget: 60V is cheaper upfront; 72V offers better long-term value for professional use.
- Future growth: If you plan to expand your delivery fleet, 72V’s scalability is a smart investment.
6. FAQ
Q: Can I switch between 60V and 72V batteries on this bike?
Q: How much range difference is there between 60V and 72V?
- 60V: ~40–50km range
- 72V: ~50–60km rangeWith 72V 165Ah: Up to 150–200km (far beyond 60V’s maximum capacity).
Q: Is 72V more expensive to maintain?
Q: Which battery is better for delivery?
7. Final Recommendation
- Choose 60V if: You’re a casual commuter, have a tight budget, or only ride short distances (<50km/day).
- Choose 72V if: You’re a delivery rider, business owner, or need long range/high performance—this is the best investment for professional use.
A Complete Guide for Delivery Riders & Business Owners
1. Why 3000W is the Sweet Spot for Delivery Work
- Strong Acceleration: The 3000W Quanshun motor delivers instant torque, so you can quickly get up to speed in stop-and-go city traffic—critical for meeting tight delivery deadlines.
- Top Speed of 85km/h: This lets you keep up with urban traffic and even handle short highway stretches, making it ideal for both city and suburban delivery routes.
Sustained Power: Unlike smaller 1500W-2000W motors, a 3000W motor maintains consistent performance even when carrying heavy loads (like multiple orders or large packages).
2. Key Features That Make This E-Motorcycle Perfect for Delivery
Durability & Safety
- Large Bumpers: Protects the bike from minor scrapes and collisions, which is essential for daily delivery use.
- Front & Rear Disc Brakes: Provides reliable stopping power in wet or dry conditions, keeping you and your cargo safe.
- 17-inch Tires (Front 90/90-17, Rear 110/80-17): Offers excellent stability and traction on rough city roads, potholes, and uneven surfaces.
Flexible Battery Options
- Standard: 60V/72V-20Ah battery for daily urban routes.
- Upgrade: Compatible with 72V 100Ah LiFePO4 or 72V 165Ah ternary lithium batteries for extended range—perfect for full-day delivery shifts without recharging.
- Battery Compartment Design: Easy access for quick swaps, so you can get back on the road in minutes.
Smart Convenience
- 3-Speed Adjustment: Switch between modes to save battery (Eco) or boost power (Sport) depending on your route.
- Bluetooth Speaker: Take hands-free calls from customers or listen to navigation prompts without taking your hands off the handlebars.
- Sturdy Rear Rack: Ready to mount delivery boxes or baskets, with a frame designed to handle heavy daily use.
3. Pros & Cons of Using a 3000W E-Motorcycle for Delivery
| Pros | Cons |
|---|---|
| Powerful enough to carry heavy delivery loads | Higher initial cost than smaller 2000W models |
| Fast acceleration and top speed for tight deadlines | Larger battery options may add weight (but improve range) |
| Low operating costs (cheaper than gas bikes) | Requires access to charging infrastructure |
| Quiet operation (no loud engine noise for residential deliveries) | May need additional storage accessories for large orders |
| Eco-friendly (zero emissions) | Some regions may have specific e-motorcycle regulations |
4. Who This E-Motorcycle is Best For
- Food Delivery Riders: Fast acceleration and stable handling make it perfect for quick restaurant-to-customer trips.
- Parcel Delivery Couriers: The heavy-duty frame and large battery options support all-day delivery routes.
- Small Business Owners: A cost-effective alternative to gas-powered delivery fleets, with lower maintenance and fuel costs.
- Urban Commuters: Doubles as a reliable daily ride when not used for delivery.
5. FAQ for Delivery Riders
Q: How far can I go on a single charge?
Q: Can it handle heavy delivery loads?
Q: How long does it take to charge the battery?
Q: Is it legal to use for delivery in my country?
6. Final Verdict
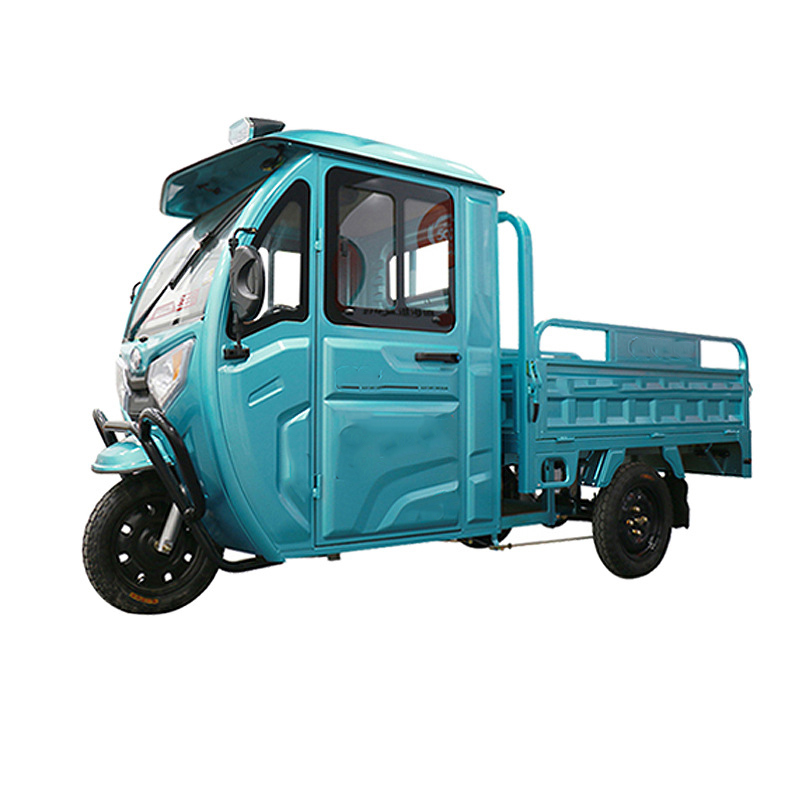
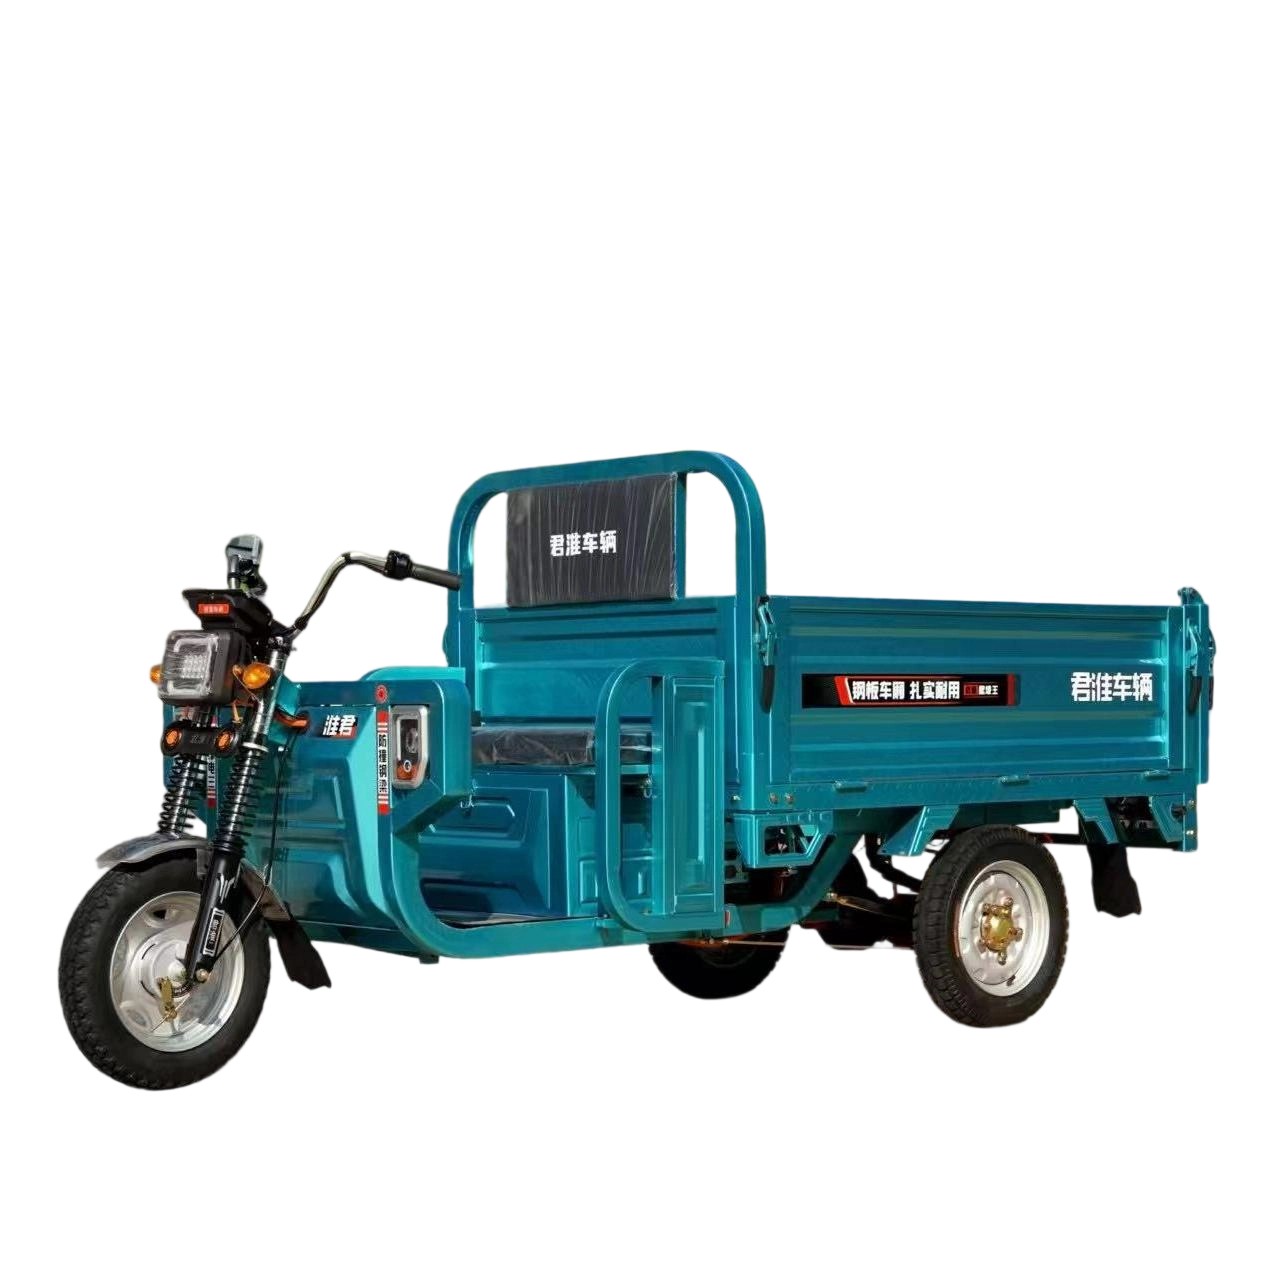
Why Customers Choose Paige Electric Cargo Tricycles
Super loading capacity for heavy cargo
Professional heavy-duty frame with a large cargo box, strong load-bearing ability, ideal for transporting goods, express, daily supplies and various materials with high efficiency.
Powerful motor for climbing with full load
Equipped with high-torque motor, it starts smoothly and climbs easily even fully loaded, providing stable and durable power for long-time daily delivery.
Stable three-wheel design for safe transportation
Low center of gravity and stable three-wheel structure effectively prevent rollover when carrying heavy loads, ensuring safe and easy control for cargo delivery.
Long battery life for all-day working
Large-capacity battery supports long endurance, allowing all-day delivery work with one full charge, no frequent recharging and higher working efficiency.
Solid and durable for long-term heavy-duty use
High-strength steel frame with solid construction, wear-resistant and not easy to deform, low failure rate, perfect for long-term heavy cargo transportation.
Factory direct supply with high cost performance
Paige direct factory supply ensures stable quality and competitive price, supporting customization. It is the best choice for merchants, delivery and logistics business.

Why Customers Choose Paige Electric Mountain Bikes
Outstanding off-road performance
It is equipped with a high-power brushless motor and professional-grade shock absorption system, providing excellent stability and control on mountain roads, steep slopes, muddy roads, gravel roads, and other complex terrains.
Strong power and long-lasting range
The high-voltage large-capacity battery offers stable power output and long endurance, fully meeting the needs of long-distance riding, outdoor adventures, and daily commuting without frequent recharging.
Solid, durable and lightweight frame
The high-strength aluminum alloy frame is lightweight, shock-resistant, and deformation-resistant, ensuring reliable performance and long service life even in harsh outdoor riding conditions.
Safe and efficient braking system
Front and rear dual disc brakes provide strong, sensitive, and stable stopping power, ensuring reliable safety when riding downhill, at high speed, on wet roads, or in emergency situations.
Comfortable ergonomic design
With adjustable suspension, wide anti-slip tires, and a comfortable saddle, it effectively reduces vibration and fatigue, bringing a relaxed and pleasant riding experience even on long trips.
Factory direct supply with high cost performance
Paige provides direct factory supply with stable quality and competitive price. We support customized services and are deeply trusted by individual users, wholesalers, and international buyers.


Why Customers Choose Paige Electric Folding Bikes
Ultra-portable & Fast Folding Design
One-step quick folding system folds the bike in 10 seconds into a compact size, easy to carry, store under a desk, or fit in a car trunk. Lightweight aluminum alloy frame (≈22kg) makes lifting and moving effortless for urban commuters.
Long-Lasting Battery & Reliable Power
High-capacity removable lithium battery delivers 50–80km range per charge. 350W/500W brushless motor provides smooth power, handles gentle slopes easily, and supports both pedal-assist and pure electric modes.
Sturdy & Comfortable Build
Reinforced aluminum frame with anti-vibration structure ensures stability and durability. Ergonomic seat, front/rear suspension, and anti-slip tires absorb shocks for a smooth ride on city roads.
Smart & Safe Features
Equipped with LED headlight, brake light, clear LCD display (speed, battery, mode), and dual disc brakes for reliable stopping. IPX4 water resistance suits daily rainy-day use.
Factory Direct & Cost-Effective
Direct factory pricing with no middleman markup, offering great value for individuals and bulk buyers. OEM/ODM customization (colors, logos) available for business partners.
Versatile for Urban Life
Perfect for last-mile commuting, shopping, campus travel, and short deliveries. Foldable and lightweight design fits seamlessly into busy, space-limited city lifestyles.
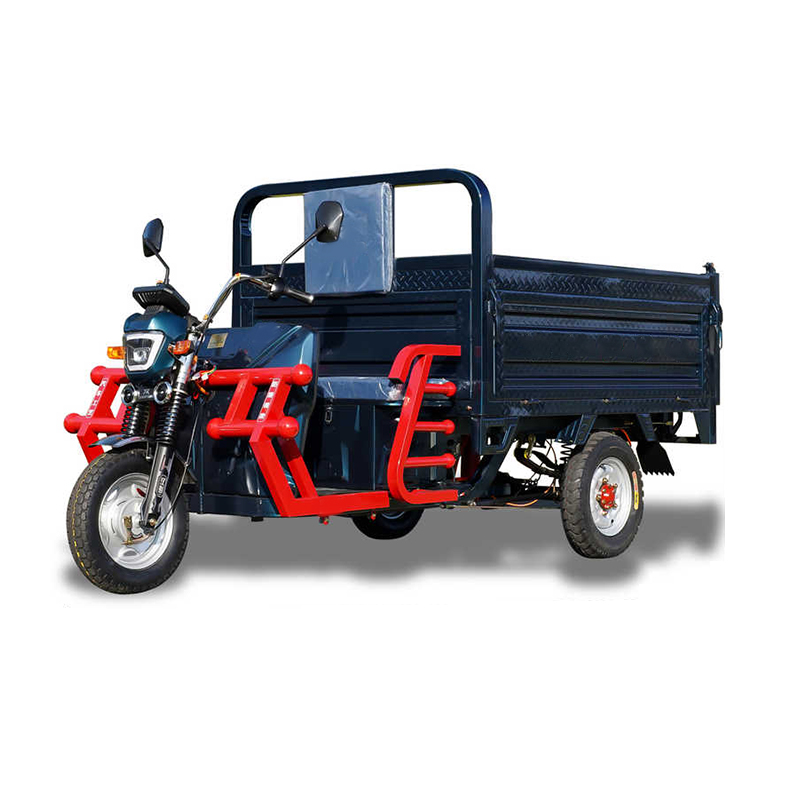
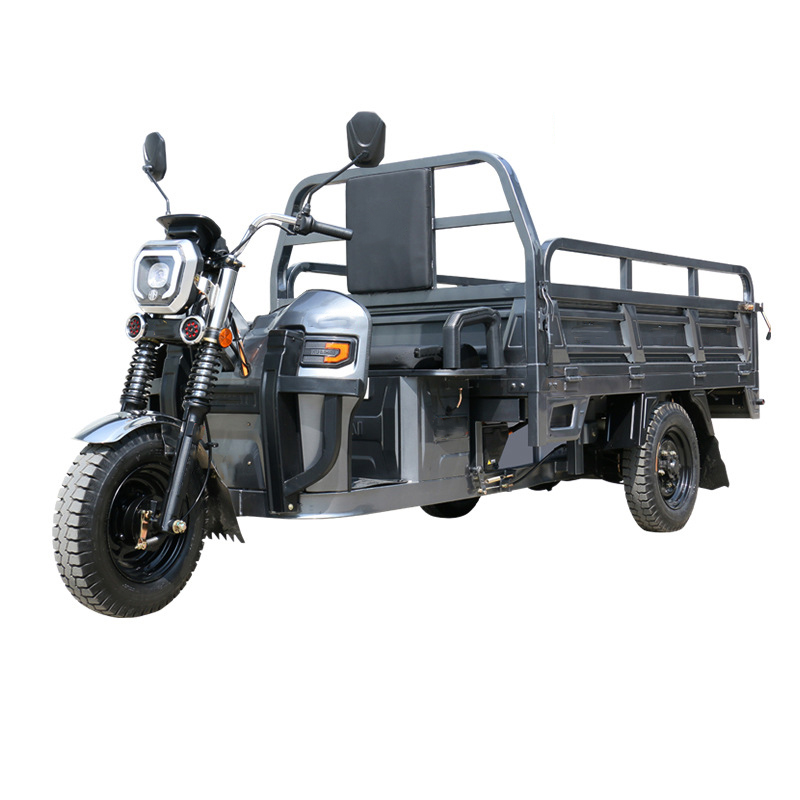
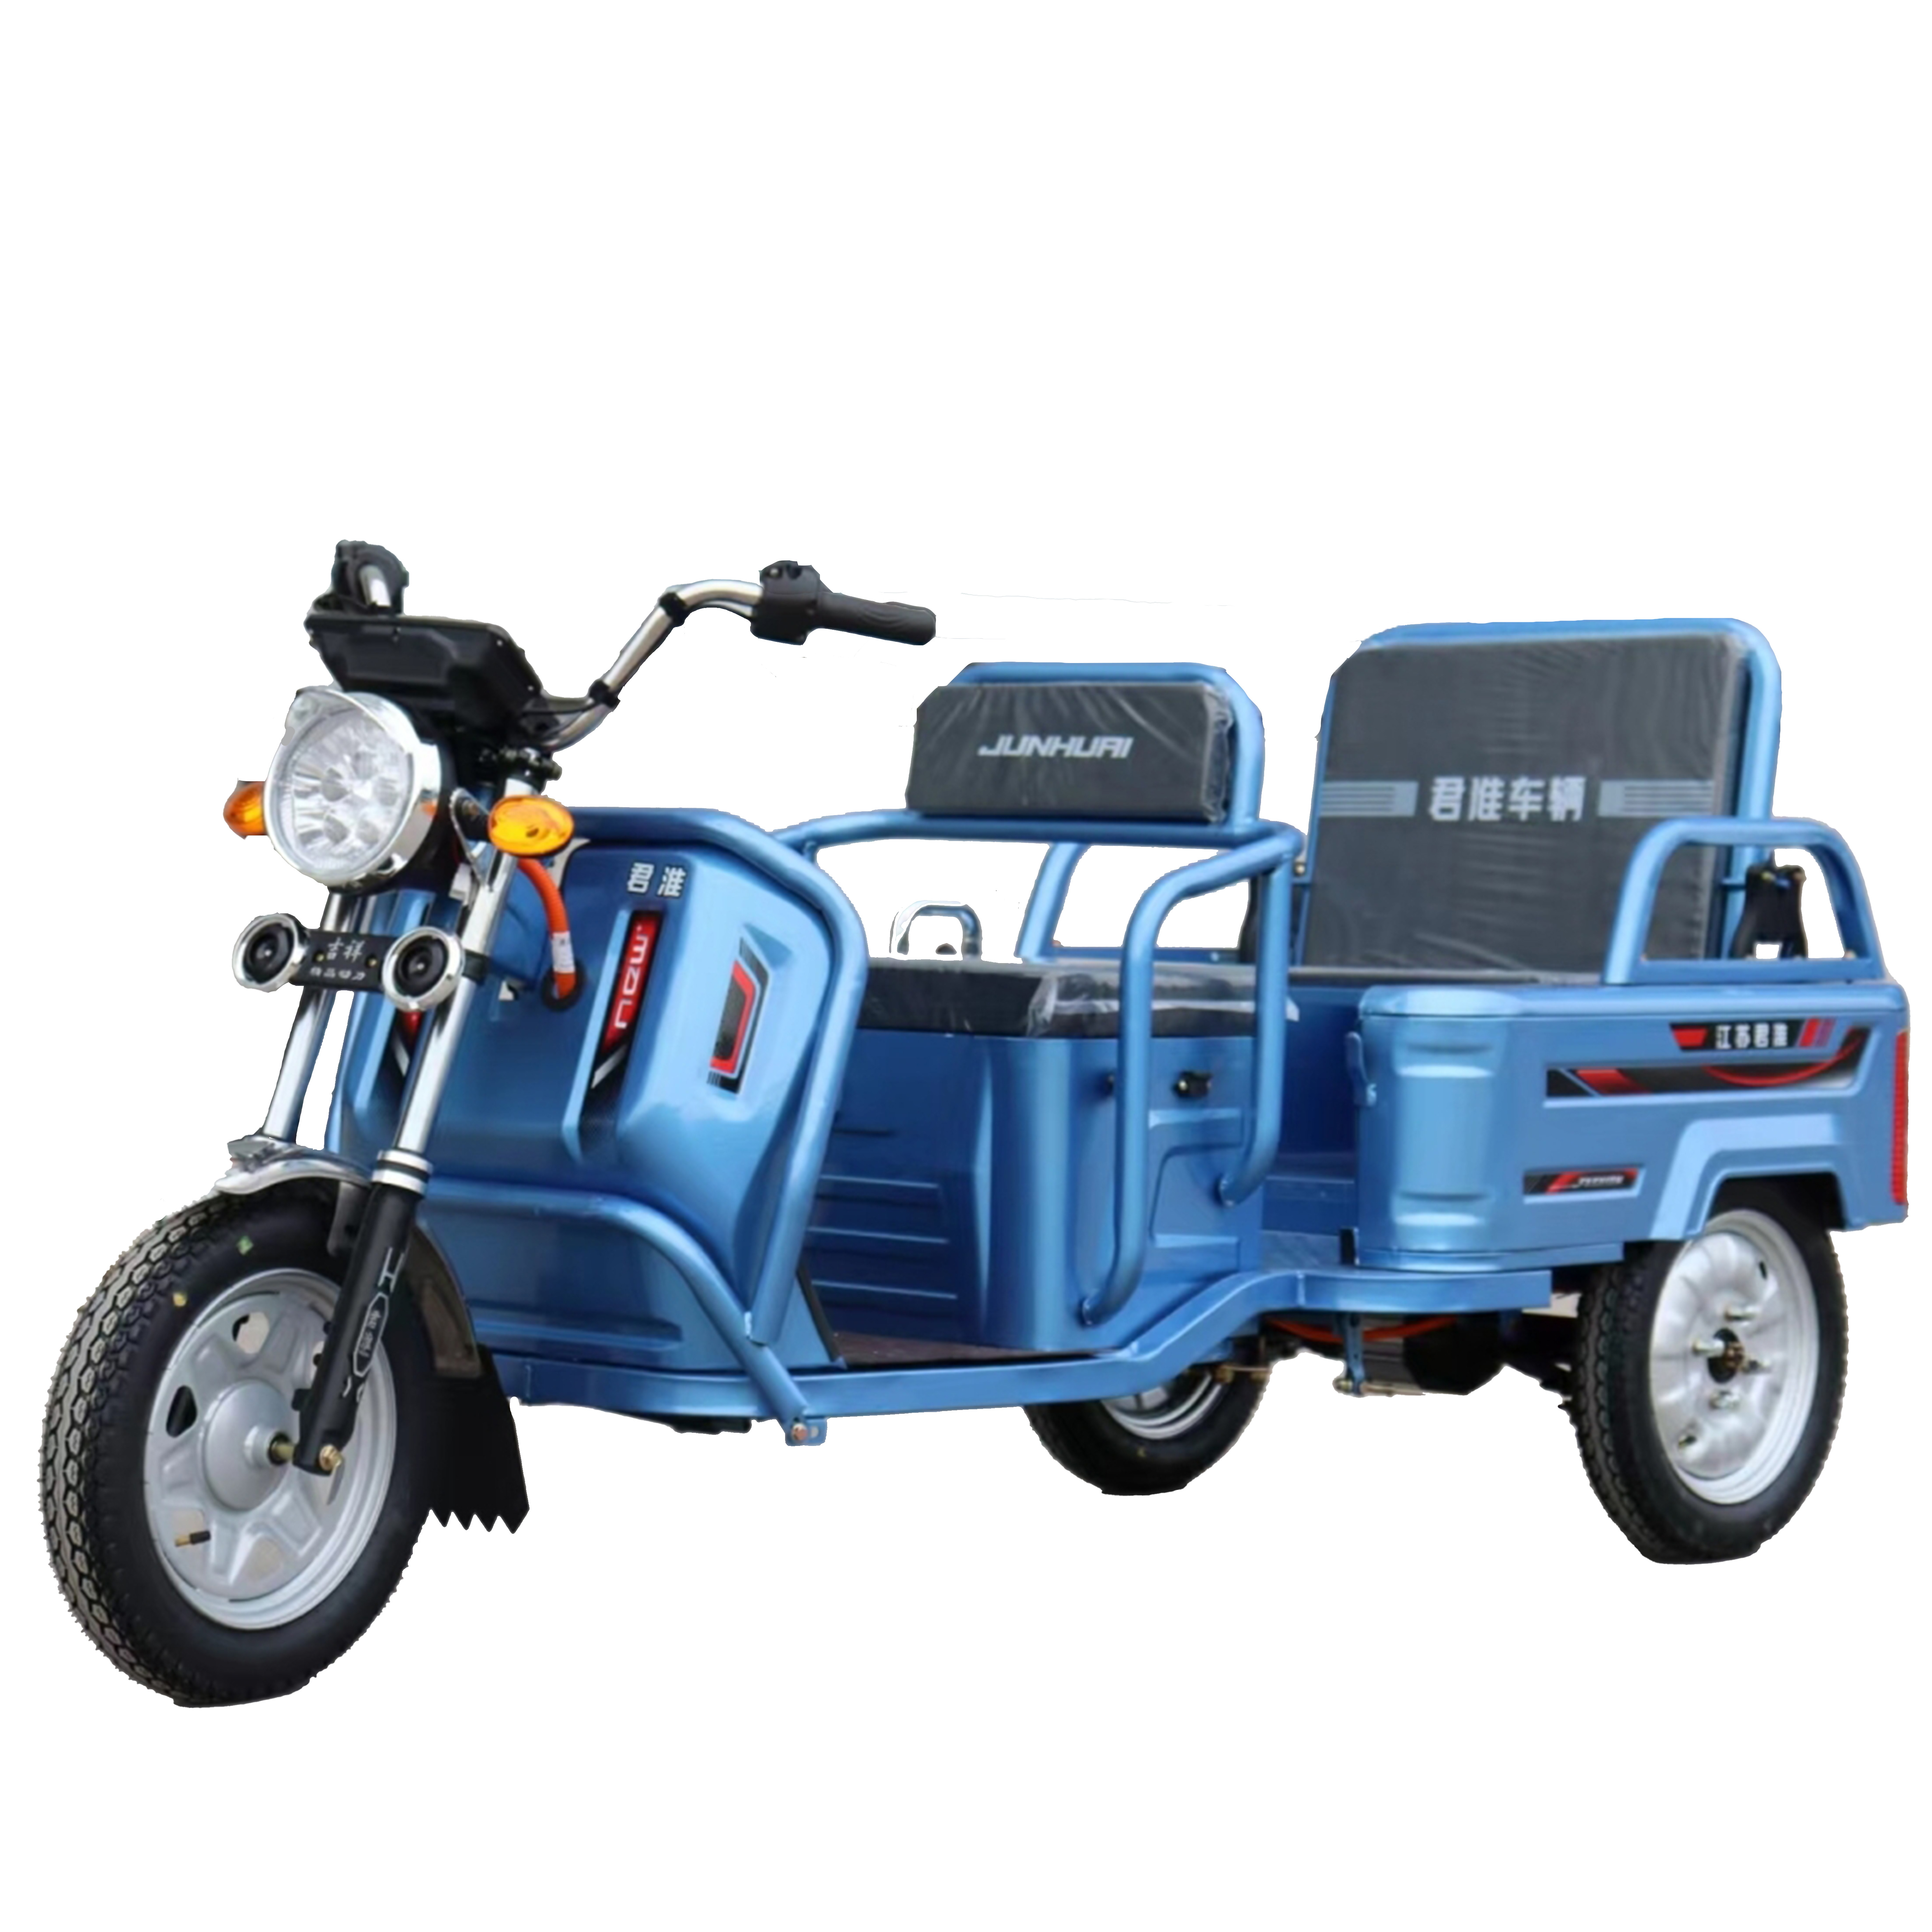
WHY CUSTOMERS CHOOSE PAIGE ELECTRIC TRICYCLE
1. Tri-wheel stability: Safe for all users
The three-wheel structure distributes weight evenly, eliminating balance concerns and tipping risks—ideal for seniors, beginners, or those carrying cargo. Widened anti-slip tires enhance grip on wet, gravel, or uneven roads, ensuring stable rides. Low step-in height and ergonomic handlebars make mounting, dismounting, and maneuvering effortless, reducing physical strain for long-term use.
2. Strong load capacity: Practical for daily & cargo use
Built with a reinforced steel frame, it supports a maximum load of 200kg, easily handling personal items, groceries, or light cargo. The rear storage rack or optional cargo box provides ample space for daily errands, small business deliveries, or outdoor supplies. The sturdy structure maintains stability even with full loads, balancing functionality and reliability for diverse usage needs.
3. Reliable battery & power: Long-lasting travel
Equipped with a high-capacity lead-acid or lithium battery (optional), it delivers a 60-100km range per full charge, covering daily commutes, community trips, or short-distance deliveries. The matching high-torque motor handles gentle slopes effortlessly, no strenuous effort required. Energy-saving technology reduces power consumption, while the detachable battery design allows convenient indoor charging, avoiding outdoor power access issues.
4. User-friendly design: Suitable for diverse groups
Intuitive operation with simple controls and clear indicators makes it easy for seniors or beginners to master. Comfortable padded seats reduce pressure on hips and legs during long rides. Compact body size ensures flexible navigation through narrow streets, alleys, or crowded markets, with easy parking in small spaces. It integrates seamlessly into daily life, serving as a mobility aid, shopping tool, or delivery vehicle.
5. Wholesale advantages: Cost-effective & flexible Factory direct pricing cuts middlemen, offering competitive rates for retailers, rental services, or bulk buyers. Customization options include colors, storage configurations, and additional functions (e.g., LED lights, safety locks) to meet market demands. Stable supply chain ensures 95% on-time delivery, with a 6-month warranty on core components (motor, battery) for worry-free cooperation.
Why Customers Choose Paige Electric bike
1. Dual power options: Flexible for urban rides Available in 350W and 500W brushless motors, this e-bike suits diverse needs. The 350W version offers smooth acceleration (25km/h max) and 40-60km range for flat urban roads, while the 500W model handles 15% gradients and 20kg loads, ideal for longer commutes. Both pair with a three-speed system (eco/standard/power) for easy mode switches, balancing efficiency and performance. 2. Durable steel frame: Reliable and comfortable Made of thickened carbon steel, the frame supports 150kg and resists rust via electrostatic spraying. Superior shock absorption eases bumps, while the ergonomic design (adjustable saddle, 155-190cm fit) reduces fatigue during long rides, lasting for years of outdoor use. 3. Efficient disc brakes: Safe in all conditions Front/rear mechanical disc brakes outperform rim brakes, offering strong, responsive stopping even on wet surfaces or with loads. Wear-resistant pads (8,000km life) and enclosed calipers prevent dust/water damage, ensuring stable, skid-free braking in busy cities. 4. Practical lead-acid battery: Cost-effective and easy to maintain The 12V/20AH lead-acid battery provides 40-80km range on 8-10 hours’ charge. Detachable with a handle for indoor charging, it requires simple maintenance (regular charging + visual checks) and offers great value vs. lithium-ion alternatives, ideal for budget-conscious users. 5. Urban-friendly: Versatile for daily and wholesale use Compact design eases navigation and parking in cities. Suitable for office workers, students, and seniors, it integrates into daily routines. Wholesale partners benefit from competitive pricing, 98% on-time delivery, color customization, and 6-month core component warranty.

Why Customers Choose Paige Electric Motorcycles
1. Multi-power & voltage options: Adapt to diverse needs Available in 1000W, 1500W, 2000W motor variants with 60V/72V voltage support, this electric motorcycle meets different usage demands—from daily commutes to long-distance trips. Higher-power models handle steep slopes and heavy loads effortlessly, while lower-power options balance efficiency and energy saving. Stable power output ensures smooth riding, suitable for adult users seeking flexibility. 2. Durable frame: Reliable for long-term use Crafted with high-strength materials, the frame boasts excellent durability, resisting deformation and wear even with frequent use. It supports a large load capacity, ensuring stability for adult riders of different body types. The robust structure withstands urban roads and light off-road conditions, reducing maintenance needs and extending service life. 3. Factory direct & OEM support: Flexible cooperation Offered at factory direct prices, it cuts middlemen for cost advantage—affordable for individual buyers and profitable for wholesalers. OEM customization is accepted, allowing partners to tailor colors, logos, and minor functions to brand or market needs. Transparent pricing and flexible cooperation terms enhance market competitiveness. 4. Efficient performance: Practical for daily use The matching of powerful motors and high-voltage batteries delivers strong torque and long endurance, covering 80-150km per charge (varies by power). Energy-saving technology reduces power consumption, while responsive acceleration adapts to urban traffic. Simple operation and comfortable seating make daily rides convenient and fatigue-free. 5. Versatile for adults: Wide application scenarios Ideal for adult daily commutes, shopping trips, and short-distance travel. The compact yet sturdy design fits urban navigation and parking. Suitable for individual users, retailers, and rental services—its reliability and adaptability make it a versatile mobility solution for diverse adult needs.
Why Does Your E-Bike Need Special Winter Maintenance in Canada?
Canada’s winter delivers three major challenges: -30℃ extreme cold, road salt spray, and icy/snowy mixed roads. These can cause battery degradation, metal corrosion, brake failure, and other issues. According to data from the Canadian Cycling Association, e-bikes without winter maintenance see a 40% reduction in battery life and a 62% increase in failure rates. This guide shares professional maintenance tips for three core scenarios—road salt protection, battery insulation, and ice/snow riding—to keep your e-bike safe all winter long!
I. Road Salt Protection: Defend Against "Invisible Corrosion"
1. Immediate Post-Ride Cleaning (Critical Step)
• Key Areas to Clean: Frame joints, motor housing, brake discs, chains, and spokes (where road salt accumulates easily)
• How to Operate: Rinse with warm water + neutral detergent (avoid high-pressure water directly on battery ports and controllers). Use a soft brush to clean gaps, then dry thoroughly with a cloth (residual moisture accelerates rust)
• Product Adaptation: We recommend our models equipped with galvanized steel frames + anodized components, which offer 3x better resistance to salt spray corrosion than standard models. Paired with IP67 waterproof motors, you don’t have to worry about water damage during cleaning
2. Long-Term Protection Solutions
• Apply winter-specific anti-rust lubricant to the chain and flywheel monthly (won’t solidify in low temperatures) to avoid failure of regular lubricants due to freezing
• Spray silicone-based protective spray on metal surfaces like frames and fenders (forms a water-repellent film to block salt spray)
• Before storage, inspect screws and bolts, and apply anti-rust paste (focus on securing brake caliper and wheel hub bolts)
II. Battery Insulation: Maintain Over 70% Range in Low Temperatures
1. Daily Usage Insulation Tips
• Pre-Ride Warm-Up: Move the battery indoors (20℃ environment) 1-2 hours in advance, or use a battery warming cover (original accessories available from us) to avoid sudden voltage drops from starting in low temperatures
• Charging Precautions: Do not charge the battery if its temperature is below 0℃ (will damage cells)—allow it to warm up indoors to above 5℃ first. Use slow charging mode (0.1C-0.2C) to avoid cell damage from alternating high and low temperatures caused by fast charging
• Range Optimization: Set the assist mode to medium while riding, and avoid frequent sudden acceleration (high-current discharge in low temperatures accelerates battery degradation)
2. Storage Insulation Solutions
• Long-term storage (over 3 days): Charge the battery to 80%, remove it, and store in a dry environment at 0-10℃ (avoid direct heating from radiators). Recharge every 2 weeks
• Short-term storage (overnight): Wrap the battery in a thermal storage bag or park in a garage (avoid outdoor exposure)
• Product Advantage: Our e-bikes are equipped with graphene low-temperature batteries, which retain 70% capacity even at -15℃—35% better range than standard lithium batteries. Built-in temperature sensors automatically activate insulation mode in cold conditions
III. Ice & Snow Riding: Safety and Handling Tips
1. Tire and Brake Adjustments
• Replace with winter anti-slip tires (tread depth ≥5mm, with anti-slip studs) and reduce tire pressure to 2.5-3.0bar (increases contact area)
• Adjust the brake system: Clean ice, snow, and salt from brake discs, and check brake pad wear (frequent braking in winter—inspect every 100km)
• Safety Features: Prioritize models with dual disc brakes + ABS anti-lock system (e.g., our Pro Series), which shorten braking distance by 40% on icy roads and prevent skidding from sudden braking
2. Riding Practical Guide
• Maintain Distance: Keep twice the safe distance compared to dry roads (braking distance is longer on ice and snow)
• Riding Posture: Shift your center of gravity backward, avoid sudden acceleration, braking, and sharp turns. Slow down in advance when turning (recommended speed ≤25km/h)
• Route Selection: Avoid icy surfaces and melting snow puddles. Prioritize salted main roads (remember to clean the bike afterward)
��️ Essential Winter Maintenance Tools
1. Neutral detergent + soft brush + dry cloth (for cleaning)
2. Winter-specific anti-rust lubricant + silicone-based protective spray
3. Battery warming cover/thermal storage bag
4. Tire pressure gauge (to monitor tire pressure)
5. Brake adjustment wrench (to check brake clearance regularly)
�� Canadian Winter E-Bike Buying Guide
• Core Configurations: Low-temperature compatible battery (starts at -30℃), corrosion-resistant frame, anti-slip tires, ABS brakes
• After-Sales Support: Choose brands offering winter maintenance services. We have service centers in Toronto and Vancouver, providing free winter inspections, cleaning, and maintenance
• Recommended Accessories: Original thermal seat covers, anti-slip grips, and extended fenders (reduce snow splatter)
❓ Frequently Asked Questions
Q: Can an e-bike ride normally at -30℃?
A: Models with low-temperature compatible batteries can start, but range will decrease by about 30%. We recommend using a battery warming cover and reducing the assist level.
Q: How to repair road salt corrosion?
A: For minor rust, clean with a wire brush and apply anti-rust paste; for severe corrosion (e.g., frame perforation), contact after-sales for parts replacement. We offer a 1-year anti-rust warranty.
�� Contact customer service now to get your personalized e-bike winter maintenance plan and enjoy 20% off original winter accessories!
# Old E-Bike Upgrade: How to Install a Removable Battery (Quick Guide)
## Introduction
Upgrading your old electric bike with a **removable battery** is one of the best cost-effective upgrades. It makes charging easier, improves safety, and extends your e-bike life. This short guide shows you how to install a removable battery quickly and safely.
## Benefits of a Removable E-Bike Battery
- Charge indoors without moving the whole bike
- Easy to replace or upgrade capacity
- Reduce theft by taking the battery inside
- Better heat dissipation and longer lifespan
## 1. Check Compatibility First
- **Voltage Match**: 36V motor ⇄ 36V battery | 48V motor ⇄ 48V battery
- **Current Match**: Battery discharge ≥ controller max current
- **Mount Space**: Choose downtube, rear rack, or seat post style
## 2. Tools & Parts You Need
- Removable lithium battery + mounting bracket
- Wrenches, screwdriver, multimeter
- Waterproof connector, fuse, cables
## 3. Step-by-Step Installation
1. Disconnect the old battery and mark wires
2. Install the battery bracket firmly
3. Mount the waterproof discharge socket
4. Connect positive & negative to the controller
5. Add fuse for safety
6. Test power, motor, and lights
## 4. Safety Tips
- Do NOT reverse positive and negative
- Use waterproof connectors
- Lock the battery securely
- Avoid damaged or swollen batteries
Conclusion
Installing a **removable battery** upgrades your old e-bike with convenience, safety, and longer range. Most standard e-bikes can complete this simple upgrade in under an hour.
-
Introduction: Why Scenario Determines Your E-Bike Choice
I. Core Demand Comparison: Urban Commuting vs. Off-Road Adventure
Comparison Dimension | City Commuting | Off-Road Adventure |
Primary Use | Daily travel (home-work/school/shopping), short-distance trips (5-20km) | Exploring trails, mountain riding, rough terrain navigation (10-50km+) |
Key Requirements | Efficiency, portability, comfort, low noise, compliance with urban regulations | Power, durability, stability, shock absorption, off-road capability |
Terrain Type | Smooth roads (asphalt/concrete), bike lanes, occasional cobblestones | Dirt roads, gravel paths, steep slopes, rocks, mud, uneven terrain |
Speed Expectation | Moderate (20-25km/h, compliant with urban speed limits) | Variable (25-45km/h, higher torque for climbing) |
Weight Sensitivity | High (easy to carry up stairs, store in apartments/offices) | Low (prioritizes structural strength over lightness) |
Weather Adaptability | Rainproof, anti-slip (for wet roads) | Dustproof, waterproof (IPX5+), resistance to extreme conditions |
II. Key Component Selection Guide
1. Motor: Power & Position Matters
- City Commuting E-Bikes
- Power Range: 250W-350W (compliant with most urban e-bike regulations, no license required)
- Position: Hub motor (front/rear) – lightweight, low maintenance, quiet operation (ideal for noise-sensitive cities). Rear hub motors offer better traction for wet roads.
- Torque: 40-60N·m (sufficient for slight inclines like overpasses or bridges)
- Recommendation: Choose a motor with "pedal-assist (PAS) + throttle" dual modes – PAS saves battery for long commutes, while throttle helps navigate traffic jams.
- Off-Road Adventure E-Bikes
- Power Range: 500W-1000W (high torque for climbing steep slopes and overcoming obstacles)
- Position: Mid-drive motor (mounted near the crankset) – distributes weight evenly, provides stronger climbing power (up to 30° slopes), and works with the bike’s gears for better control on rough terrain.
- Torque: 80-150N·m (critical for tackling rocks, mud, and steep ascents)
- Recommendation: Opt for a brushless DC motor with IPX6+ waterproof rating – durable and reliable in dusty/muddy conditions.
2. Battery: Range & Portability
- City Commuting
- Capacity: 10Ah-15Ah (lithium-ion battery, range 40-80km per charge)
- Portability: Removable battery – easy to charge indoors (no need to park near power outlets)
- Charging Speed: 2-4 hours (fast charging for daily use)
- Tip: Prioritize "battery life protection" features (overcharge/over-discharge prevention) for long-term use.
- Off-Road Adventure
- Capacity: 15Ah-25Ah (high-capacity battery, range 60-120km per charge)
- Portability: Less critical – fixed or semi-removable battery (sealed for dust/water resistance)
- Charging Speed: 4-6 hours (focus on durability over fast charging)
- Tip: Choose a battery with "low-temperature protection" if riding in cold mountain areas (prevents performance drop in sub-zero temperatures).
3. Tires: Grip & Durability for Terrain
- City Commuting
- Size: 16-20 inches (smaller tires for better maneuverability in narrow streets)
- Type: Slick or semi-slick tires (smooth tread for low rolling resistance, saves battery; slight tread for anti-slip on wet roads)
- Width: 2.125-2.25 inches (balances comfort and efficiency)
- Feature: Puncture-resistant layer (avoids flat tires from glass/nails on city roads)
- Off-Road Adventure
- Size: 24-27.5 inches (larger tires for better ground contact and obstacle clearance)
- Type: Knobby tires (deep, aggressive tread for maximum grip on dirt, gravel, and mud; self-cleaning design to prevent mud buildup)
- Width: 2.5-4.0 inches (wider tires distribute weight, reduce sinking in soft terrain)
- Feature: Tubeless tires (avoids pinch flats from rocks; some with reinforced sidewalls for impact resistance)
4. Suspension System: Comfort & Stability
- City Commuting
- Option 1: Front suspension fork (80-100mm travel) – absorbs shocks from cobblestones or potholes, improves comfort on uneven city roads.
- Option 2: Rigid fork (for ultra-smooth urban roads) – lighter, more efficient, and lower maintenance.
- Bonus: Seat post suspension – reduces fatigue from long rides on hard surfaces.
- Off-Road Adventure
- Must-Have: Full suspension (front fork + rear shock absorber) – 120-180mm travel for absorbing impacts from rocks, jumps, and steep descents.
- Front Fork: Lockable suspension (switch to rigid mode on smooth trails to save energy)
- Rear Shock: Adjustable damping (adapts to different terrain hardness, from soft mud to hard rocks)
5. Brake System: Safety for Scenarios
- City Commuting
- Disc brakes (hydraulic or mechanical) – reliable stopping power on wet roads; mechanical disc brakes are easier to maintain.
- Brake Sensitivity: Moderate (avoids sudden stops that risk collision with pedestrians/cars)
- Bonus: Integrated brake lights (automatically turn on when braking, improves visibility in traffic)
- Off-Road Adventure
- Hydraulic disc brakes – stronger stopping power, better heat dissipation (critical for long descents), and consistent performance in dusty/muddy conditions.
- Rotor Size: 180-203mm (larger rotors for more braking force)
- Bonus: Four-piston calipers (enhanced braking efficiency for heavy-duty use)
III. Additional Features to Consider
City Commuting E-Bikes
- Portability: Foldable design (easy to store in cars, subways, or small apartments) – look for foldable models under 25kg.
- Practicality: Built-in fenders (prevents mud splatter), rear rack (carries bags/laptops), integrated lights (for night riding), USB charging port (powers phones).
- Compliance: Ensure it meets local urban regulations (e.g., EU: 250W motor, 25km/h max speed; US: 750W motor for some states).
Off-Road Adventure E-Bikes
- Durability: Frame material (aluminum alloy or carbon fiber – aluminum is affordable and strong; carbon fiber is lightweight for extreme rides).
- Control: Wide handlebars (improves stability), ergonomic grips (reduces hand fatigue), multiple PAS levels (adjust power for different terrain).
- Safety: Tire pressure monitoring system (TPMS), heavy-duty kickstand (supports the bike on uneven ground), reflective strips (for low-light conditions).
IV. Quick Decision-Making Checklist
Choose a City Commuting E-Bike If:
Choose an Off-Road Adventure E-Bike If:
V. Final Tips for Purchase
- Test Ride First: Experience the bike’s handling, PAS responsiveness, and comfort – city bikes should feel agile, while off-road bikes should feel stable on uneven ground.
- Brand Reliability: Choose brands with good after-sales service (e.g., Bosch, Shimano for motors; LG, Samsung for batteries) – critical for long-term use.
- Budget Allocation: City bikes (\(800-\)2,000) – invest in portability and practical features; Off-road bikes (\(1,500-\)4,000) – prioritize motor power, suspension, and durability.
- Future Needs: If you occasionally switch between scenarios, consider a "hybrid e-bike" (350W-500W motor, semi-knobby tires, front suspension) – balanced for light off-roading and city use.
1. Preparation Tools & Materials
- Essential Tools: Wrench, socket, screwdriver, needle-nose pliers, piston press (disc brake-specific), anti-squeal paste, cleaning cloth;
- Replacement Materials: Vehicle-compatible brake pads (disc/drum), brake cable (if replacement is needed);
- Safety Premise: Turn off the power, pull out the key, and secure the vehicle firmly.
2. Disc Brake System Replacement Steps
Step 1: Remove the Old Brake Pads
- Open the brake fluid reservoir cap. If the brake fluid is overfilled, use a syringe to suck out some (to prevent overflow during installation);
- Remove the tire (refer to Step 2 of Tire Replacement), use a wrench to unscrew the caliper mounting bolts, and take out the old brake pads;
- Wipe the inside of the brake caliper with a cleaning cloth to remove dust and oil. Check for rust on the caliper piston (replace the caliper if there is any issue).
Step 2: Install the New Brake Pads
- Apply a small amount of anti-squeal paste to the friction surface of the new brake pads (to reduce noise);
- Use a piston press to slowly push the caliper piston back to its original position (to facilitate the installation of new pads);
- Install the new brake pads in place, tighten the caliper mounting bolts, and close the reservoir cap.
Step 3: Debugging & Test Ride
- Repeatedly squeeze the brake lever to reset the piston and make it fit with the brake pads;
- Check the brake feel: Too tight will increase wear, while too loose will result in ineffective braking. Fine-tune using the brake lever travel knob;
- Reinstall the tire and conduct a low-speed test ride: The braking distance should be within 1.5 meters (at 20km/h). It is qualified if there is no abnormal noise or deviation.
3. Drum Brake System Replacement Steps
Step 1: Remove the Rear Wheel & Brake Drum
- Remove the rear wheel according to the tire replacement steps, loosen the drum brake adjustment screw, use needle-nose pliers to remove the brake drum fixing spring, and pull out the brake drum;
- Check the inner wall of the brake drum: If it is severely worn or has grooves, replace the brake drum together.
Step 2: Replace the Brake Shoes
- Use needle-nose pliers to remove the tension spring connecting the old brake shoes and take out the old shoes;
- Install the new brake shoes in the original position, hang the tension spring (note the direction of the spring hook faces the front), and adjust the position of the brake shoes to ensure uniform clearance with the inner wall of the brake drum.
Step 3: Reset & Debugging
- Reinstall the brake drum and rear wheel, and tighten the axle nut;
- Adjust the brake cable tightness: When squeezing the brake lever, the travel should be 1-2cm. The rear wheel should lock quickly without dragging during braking;
- Test Ride Inspection: When squeezing the brake with no load, the rear wheel should stop rotating. There should be no continuous friction noise during riding.
1. Preparation Tools & Materials
- Essential Tools: Socket wrench (6-14mm), adjustable wrench, 2 tire levers, air pump, soapy water (for lubrication), brush (for cleaning)
- Replacement Materials: Vehicle-compatible inner tube + outer tire (prefer original specifications), tire repair file/sandpaper (backup)
- Safety Gear: Gloves (to prevent cuts), goggles (to prevent debris)
2. Replacement Steps (Taking Rear Wheel as Example; Front Wheel Is Simpler)
Step 1: Pre-Safety Operations
- Turn off the power and pull out the key. Prop up the electric bike with both the main stand and side stand, and stabilize the body with bricks to prevent tipping;
- For disc brake models, use a caliper locking tool to secure the brake disc in advance to avoid damaging the brake system during disassembly.
Step 2: Remove the Wheel Assembly
- Drum brake models: Loosen the brake cable adjustment nut to separate the brake shoes from the hub; Disc brake models: Unscrew the caliper mounting bolts, remove the caliper, and place it properly (do not pull the brake hose);
- For chain-equipped models: Loosen the rear fork tensioner and remove the chain;
- Use a socket wrench to unscrew the rear wheel axle nut, take out the axle pin, and pull the rear wheel backward as a whole. Be careful to protect the motor wires (avoid pulling the Hall sensor wire for brushless motors).
Step 3: Disassemble the Old Tire
- Release all remaining air from the inner tube. Insert a tire lever into the gap between the rim and tire bead, pry open a gap, then insert the second lever and gradually pry open one side of the outer tire bead along the circumference;
- Take out the inner tube, then use the same method to pry open the other side of the bead and remove the old outer tire;
- Clean the rim with a brush. Check for burrs, deformation on the rim edge, and loose spokes (repair any issues first).
Step 4: Install the New Tire
- Outer Tire Lubrication: Apply soapy water evenly to the outer tire bead to reduce installation resistance;
- Inner Tube Preparation: Inflate the new inner tube slightly (to form an oval shape) to avoid wrinkles or punctures during installation;
- Embed the Outer Tire: First press one side of the outer tire bead fully into the rim groove, then insert the inner tube between the outer tire and rim in the correct direction. Ensure the valve stem aligns with the rim valve hole without twisting or pinching;
- Press the Bead: Use tire levers to gradually press the other side of the bead into the rim along the circumference. For the last few centimeters, press firmly with both hands. Never use sharp tools like screwdrivers (easily puncture the inner tube).
Step 5: Inflation, Leak Detection & Reset
- Step-by-Step Inflation: First inflate to 0.5bar (low pressure), rotate the tire to check if the bead is fully attached to the rim, then gradually inflate to the manufacturer's recommended tire pressure (marked on the outer tire sidewall, usually 2.0-2.5bar);
- Leak Detection: Apply soapy water to the valve stem, tire surface, and bead. No bubbles indicate qualification;
- Reinstall the Rear Wheel: Insert the rear wheel axle pin into the fork, pre-tighten the axle nut and then tighten it to the manufacturer's torque. Reset the chain (adjust tension), brake system, and reconnect the motor wires;
- Test Ride: Ride slowly for 1-2 km, check the brakes, tire pressure, and for any abnormal noise. It is ready for normal use if everything is in order.
Simplified Version for Front Wheel: No need to handle the chain or motor wires. Directly unscrew the axle bolts to remove the front wheel. Subsequent steps are the same as the rear wheel. Note the tire tread direction (the arrow points to the riding direction).
How to Customize Your Electric Bike: Stickers, Lights & Accessories Ideas
Electric bikes (e-bikes) aren’t just eco-friendly commuting tools—they’re extensions of your personality. Customizing your e-bike with stickers, lights, and thoughtful accessories lets you stand out on the road while enhancing functionality and safety. Whether you’re a daily commuter, weekend adventurer, or style enthusiast, this guide will help you transform your ride without compromising performance or legality.
Part 1: Stickers – Express Your Style Durably
Stickers are the easiest way to add personality to your e-bike, but choosing the right type and design is key to long-lasting results.
Choose the Right Material
• Waterproof Vinyl: The gold standard for outdoor use. Vinyl stickers resist rain, UV rays, and scratches, making them ideal for e-bike frames. Look for 3M or Oracal vinyl with permanent adhesive for multi-year durability.
• Eco-Friendly Options: Opt for stickers made with water-based inks and biodegradable adhesives to align with sustainable riding values. Recycled PET film stickers are another green choice that doesn’t sacrifice durability.
• Avoid Water-Resistant Paper: Paper-based stickers may be cheaper, but they smudge, peel, and fade quickly when exposed to moisture or frequent handling. Save them for indoor accessories only.
Creative Design Ideas
• Custom Graphics: Use online tools to design personalized stickers with your name, favorite quotes, or unique patterns. 3D 立体贴花 (3D raised stickers) add texture for a premium look.
• Theme-Based Kits: Go for retro 1970s-inspired designs (echoing Future Motion’s Antic mini-bike aesthetic) or bold geometric patterns. Branded stickers from your e-bike manufacturer can add a cohesive touch.
• Accent Placement: Apply stickers to frame tubes, battery cases, or fenders—avoid blocking vents, sensors, or reflective elements. Wheel rim stickers create a dynamic “motion blur” effect when riding.
Application Tips
1. Clean the surface with isopropyl alcohol to remove dirt and oil.
2. Measure and mark positions with masking tape before peeling the backing.
3. Apply slowly, smoothing out bubbles with a credit card.
4. For curved surfaces, warm the sticker slightly with a hair dryer (low heat) to improve flexibility.
Part 2: Lights – Safety Meets Style
Lights are non-negotiable for visibility, but modern options let you customize while staying compliant with local regulations.
Must-Have Functional Lights
• Front Headlights: Choose LED models with at least 200 lumens for urban riding and 500+ lumens for trails. Look for USB-rechargeable designs with multiple modes (low, high, flash).
• Rear Tail Lights: Opt for compact, weatherproof LED lights with red flash modes. Some models sync with brakes for enhanced visibility.
• Compliance Note: Avoid ultra-bright “strobe” lights that blind other road users—these are illegal in many regions and pose safety hazards. Check local laws for lumen limits.
Creative Accent Lighting
• LED Strip Lights: Install waterproof LED strips along frame tubes or under the seat for a subtle glow. Choose warm white or RGB options (controllable via app) for customizable colors.
• Wheel Lights: Battery-powered hub lights or spoke lights create a fun, eye-catching effect without affecting performance. Solar-powered versions reduce battery drain.
• Smart Lighting: Invest in motion-sensor lights that brighten when you brake or turn, combining style with practicality.
Installation Safety Rules
• Never modify the e-bike’s original wiring or battery system—use battery-powered or USB-rechargeable lights instead.
• Ensure lights are securely mounted to avoid vibration damage.
• Test lights regularly to confirm they don’t interfere with handlebars, brakes, or suspension.
Part 3: Accessories – Functionality & Personality
Accessories should balance style with utility, enhancing your riding experience while reflecting your taste.
Eco-Friendly Essentials
• Sustainable Storage: Choose pannier bags made from recycled polyester (rPET) or upcycled sailcloth, or bamboo fenders that are lightweight and biodegradable.
• Natural Materials: Cork handlebar grips or organic cotton saddle covers add comfort and eco-credibility. Recycled aluminum racks are durable and low-impact.
Practical & Stylish Picks
• Comfort Upgrades: Swap the stock saddle for a memory-foam or ergonomic model. Add padded knee warmers for cooler rides.
• Convenience Tools: Install a phone mount with wireless charging (ensure it’s vibration-resistant) or a waterproof storage case for keys and snacks.
• Retro Touches: Channel the Antic mini-bike’s vintage vibe with a classic bell, leather saddlebag, or chrome accents.
Safety-Centric Accessories
• Anti-Theft Devices: A sleek U-lock or GPS tracker (hidden in the frame) adds security without cluttering your bike’s look.
• Reflective Gear: Pair lights with reflective stickers, ankle bands, or a reflective vest for 360° visibility.
• Weather Protection: Waterproof seat covers and fenders (available in matte black, neon, or wood grain) keep you dry while adding style.
Part 4: Customization Do’s & Don’ts
Do:
• Prioritize safety: Ensure all modifications don’t block brakes, wheels, or visibility.
• Check local regulations: Avoid illegal changes like speed “de-restriction” or oversize batteries—these can lead to fines or insurance denial.
• Choose durable, weather-resistant materials: Outdoor exposure demands quality to prevent frequent replacements.
Don’t:
• Overcrowd your bike: Too many stickers or accessories can weigh it down and create wind resistance.
• Compromise functionality: Never cover sensors, vents, or charging ports.
• Ignore maintenance: Clean stickers and lights regularly to preserve their appearance and performance.
Final Thoughts
Customizing your e-bike is about balancing self-expression with safety and practicality. Whether you opt for bold stickers, subtle accent lights, or eco-friendly accessories, the goal is to create a ride that feels uniquely yours. Remember to share your customizations online—you might inspire other riders to get creative!
Ready to start? Begin with small, affordable changes (like vinyl stickers or LED strips) and build up to bigger upgrades. Your personalized e-bike will not only turn heads but also make every ride more enjoyable.
- Avoid Full Charge/DischargeStick to 20-80% battery level for daily use. Only fully charge right before long rides (deep cycles wear batteries out faster).
- Prioritize Eco Mode: Use low-power assist for flat roads; reserve high modes for hills or headwinds. Less assist = more miles.
- Keep Tires Inflated: Hit the manufacturer’s recommended PSI (30-50). Soft tires create extra resistance, forcing the battery to work harder.
- Ditch Extra Weight: Leave unused bags, tools, or gear at home. Less load means less battery drain.
- Skip Extreme Temps: Don’t ride or store your e-bike in heat over 35°C (95°F) or cold below 0°C (32°F)—batteries degrade rapidly in extremes.
- Coast When You Can: Let momentum carry you on flats or downhill instead of keeping assist on—save power for when you need it.
- Smooth Starts & Stops: Avoid rapid acceleration or harsh braking. Gentle inputs conserve battery and feel better to ride.
- Charge Smart: Unplug the battery once it’s fully charged (overcharging damages cells). Always use the original charger—cheaper alternatives risk harm.
- Clean Battery Contacts: Wipe terminals with a dry cloth monthly to remove dust or corrosion. Good connections mean efficient power flow.
- Plan Flat Routes: Whenever possible, choose paved, flat roads over steep hills or rough trails. Less effort for the bike = more range for you.
Final Tip
Other Articles
Advantages and Disadvantages of Lithium-Ion Batteries with Different Materials
Causes and Solutions for Electric Vehicle Motor Not Rotating
Precautions for the Use and Maintenance of Electric Vehicle Brake Systems
What Types of Motors Are There for Electric Bicycles?
The Core Impact of Temperature on Battery Capacity
Minimalist Guide to Electric Vehicle Battery Use in Winter
Comparison of Key Features of Major Battery Brands and Models
Commuter E-Bike Buying Guide: 5 Key Indicators Every Office Worker Must Know
Weekly Quick Checks (5-10 mins)
- Visual & Clean: Wipe dust/dirt from the frame, battery, and display with a damp cloth—avoid water on electrical parts.
- Tire Pressure: Check if tires are inflated to the manufacturer’s recommended PSI (usually 30-50)—soft tires waste battery and risk flats.
- Brakes: Test front/rear brakes—they should feel firm and stop smoothly. Adjust brake levers if loose.
- Battery Connection: Ensure the battery is securely locked and the power cord is not frayed.
- Display & Lights: Turn on the bike to confirm the display works (battery level, speed) and lights function.
Monthly Basic Maintenance (15-20 mins)
- Chain Care: Wipe dirt from the chain, then apply a small amount of e-bike-specific lubricant (avoid over-oiling).
- Screw Tightening: Check and tighten loose screws on handlebars, seatpost, and fenders—vibrations can loosen them.
- Battery Health: Charge the battery to 50-80% if not using for long (avoid full charge/discharge storage). Clean battery contacts with a dry cloth.
- Brake Pad Check: Inspect brake pads—replace if they’re worn down to 1mm or less.
- Tire Wear: Look for cracks, bulges, or worn tread. Replace tires if damage is visible.
Pro Tip
Other Articles
Advantages and Disadvantages of Lithium-Ion Batteries with Different Materials
Causes and Solutions for Electric Vehicle Motor Not Rotating
Precautions for the Use and Maintenance of Electric Vehicle Brake Systems
What Types of Motors Are There for Electric Bicycles?
The Core Impact of Temperature on Battery Capacity
Minimalist Guide to Electric Vehicle Battery Use in Winter
Comparison of Key Features of Major Battery Brands and Models
Commuter E-Bike Buying Guide: 5 Key Indicators Every Office Worker Must Know
An urban e-bike isn’t just a short-distance transport option—it’s the ultimate mobility solution for modern e-bike commuters. Designed to solve every pain point of city travel, an electric bike for urban commuting blends efficiency, savings, and practicality, making it the smart choice for daily commutes, grocery runs, school runs, and casual urban rides. If you’re on the fence about investing in an electric bike, these core reasons will make your decision easy:
1. Urban E-Bike: Beat Congestion & Master Your Commute Time
As an e-bike commuter, you’ll skip crippling urban traffic jams by using dedicated bike lanes—30% faster than driving or ride-hailing during rush hours. No more waiting for delayed public transit or circling for parking spots: an urban e-bike delivers true door-to-door travel, so you control your schedule down to the minute. Its pedal assist technology conquers hills, headwinds, and long stretches effortlessly, meaning you arrive at work or home fresh, no sweat required.
2. Electric Bike for Commuting: Ultra-Low Cost, Long-Term Savings
- Daily use: A full charge for your urban e-bike costs just ¥0.5-1.5, powering 40-100km of travel—monthly electricity bills under ¥10 for regular commutes.
- No hidden fees: No insurance, fuel, parking, or toll charges; minimal maintenance (only basic tire and brake checks).
Affordable entry: Entry-level electric bikes for urban commuting start at ¥1000+, with many cities offering subsidies to cut upfront costs—slashing your monthly transport spend by 50% or more vs. cars or ride-sharing.
3. E-Bike Commuting: Fitness Without Exhaustion
E-bike commuting redefines active urban travel for all fitness levels. Adjust your urban e-bike’s pedal assist level to match your mood: low assist for a light workout (burn 200-500 calories in a 30-minute ride) or high assist for effortless travel. It’s the perfect way to fit daily exercise into a busy schedule—no gym time needed. Outdoor e-bike commuting also relieves stress, boosts mental health, and keeps you away from the health risks of a sedentary office life.
4. Urban E-Bike: All-Scene Flexibility for Daily Urban Life
One urban e-bike covers every short-distance urban need: daily commuting, grocery runs, picking up kids, and weekend casual rides. Compact and maneuverable, it glides through narrow city streets and alleys, and can be fitted with a basket, child seat, or rear rack for extra practicality. Mid-to-high-end electric bikes offer an 80-150km range, perfect for suburban day trips too. No driver’s license is needed for standard urban e-bikes—it’s easy to master for riders of all ages.
5. Electric Bike: Eco-Friendly Urban Travel for a Greener City
An electric bike is a zero-emission transport choice, with just 1/30 the carbon footprint of a gasoline car—your daily e-bike commuting helps cut urban air pollution and reduce your environmental impact. Unlike cars, an urban e-bike takes up almost no space: store it on a balcony, in an office corner, or in a car trunk (foldable electric bike models). It’s the ideal green travel choice for urban dwellers and renters alike.
6. Urban E-Bike: Better Than Traditional Bikes & Shared Transport
Your Perfect Urban E-Bike Awaits
Other Articles
Advantages and Disadvantages of Lithium-Ion Batteries with Different Materials
Causes and Solutions for Electric Vehicle Motor Not Rotating
Precautions for the Use and Maintenance of Electric Vehicle Brake Systems
What Types of Motors Are There for Electric Bicycles?
The Core Impact of Temperature on Battery Capacity
Minimalist Guide to Electric Vehicle Battery Use in Winter
Comparison of Key Features of Major Battery Brands and Models
Commuter E-Bike Buying Guide: 5 Key Indicators Every Office Worker Must Know
I. Core Concept: What Are Lithium Battery Cells?
II. 4 Key Indicators of Cell Quality
1. Energy Density (Unit: Wh/kg)
- Definition: The amount of electrical energy stored per unit weight/volume, directly affecting battery pack weight and maximum range.
- Practical Significance: The energy density of mainstream e-bike cells ranges from 150-200Wh/kg. Higher density means longer range for batteries of the same weight (e.g., high-quality 18650 ternary lithium cells reach 180Wh/kg, while inferior ones only hit 120Wh/kg).
- Pitfall to Avoid: Beware of false claims like "high capacity with low weight" — energy density has physical limits; excessive labels are mostly false.
2. Cycle Life (Unit: Cycles)
- Definition: The number of charge-discharge cycles until the cell capacity degrades to 80% of its initial capacity, a core indicator of battery lifespan.
- Grading Standards:
- High-Quality Cells: ≥1200 cycles (3-5 years of normal use)
- Regular Cells: 800-1000 cycles (2-3 years of normal use)
- Inferior Cells: ≤500 cycles (capacity halved in about 1 year)
- Related Technology: Echoing the "lithium battery replacement of lead-acid batteries" in development history — lead-acid batteries only have a cycle life of around 300 cycles, so the high cycle life of lithium cells is their core advantage.
3. Consistency (Voltage/Capacity Deviation)
- Definition: The degree of variation in voltage, capacity, and internal resistance among all cells in the same battery pack (measured by CV% coefficient of variation in the industry).
- Importance: Poor cell consistency leads to the "barrel effect" — even one underperforming cell will drag down the entire battery pack’s range and lifespan, and may even cause overcharging, over-discharging, or fire risks.
- Qualification Standard: For high-quality battery packs, cell capacity deviation ≤2%, voltage deviation ≤0.02V, and internal resistance deviation ≤5mΩ.
4. Safety (Thermal Stability/Short-Circuit Resistance)
- Core Tests: Puncture test, crush test, overcharge/over-discharge test (complying with safety standards such as UL 2849 and GB 31484).
- Material Differences:
- Ternary Lithium Cells: High energy density but weak thermal stability; inferior products are prone to fire under high temperature/short circuit (requiring a high-quality BMS protection board).
- Lithium Iron Phosphate Cells: Strong thermal stability (no fire when punctured) and longer cycle life, but slightly lower energy density (suitable for commuting scenarios prioritizing safety).
III. Classification of Lithium Battery Cell Quality Grades (200 words)
Grade | Source | Core Features | Application Scenarios | Risk Points |
Grade A (Genuine Original) | Produced by top-tier manufacturers such as CATL, BYD, Panasonic, and LG with full-process inspection | High energy density, cycle life ≥1200 cycles, excellent consistency, safety-compliant | Mid-to-high-end e-bikes (Yadea, NIU, Rad Power Bikes, etc.) | No obvious risks; only need to ensure regular channels |
Grade B (Slightly Defective) | Cells failing to meet Grade A standards during original production (e.g., slightly excessive capacity deviation, minor appearance flaws) | Cycle life 600-800 cycles, moderate consistency, safety-compliant | Entry-level e-bikes, second-hand batteries | Possible uneven range degradation during long-term use |
Grade C (Inferior Defective) | Produced by small factories without inspection processes | Cycle life ≤500 cycles, poor consistency, unsafe | Low-cost no-brand e-bikes, modified batteries | High fire risk, severe capacity false labeling |
Recycled Cells (Used/Refurbished) | Re-encapsulated cells disassembled from waste batteries | Severe capacity degradation, extremely poor consistency, high safety hazards | Illegal modified batteries, counterfeit products by unscrupulous merchants | Prone to short circuit and fire, service life only a few months |
IV. 5 Practical Methods for Ordinary Users to Identify Cell Quality (200 words)
1. Check Brand and Certification
- Request cell supplier information from the merchant (e.g., "CATL ternary lithium cells" or "LG 21700 cells") and reject "no-brand cells".
- Verify the battery pack’s safety certifications (UL 2849, CE, CPSC, etc.). Complete certifications indicate the cells have passed compliant inspections.
2. Test Range and Degradation
- Actual Riding Test: Ride at daily speed with a full charge and record the real range (a deviation ≤10% from the claimed range indicates high quality).
- Long-Term Observation: If the range degrades by more than 30% after 6 months of use, the cells are likely Grade B/C.
3. Inspect Battery Pack Craftsmanship
- High-Quality Battery Pack: Tightly sealed shell without leakage traces, neat wiring, and equipped with a temperature sensor (ensuring charging safety).
- Inferior Battery Pack: Loose shell, rough interfaces, no brand logo or production batch number.
4. Measure Consistency with Tools (Optional)
- Use a multimeter to measure the battery pack’s no-load voltage (after standing for 1 hour). If the voltage fluctuates by more than 0.1V in multiple measurements, the cell consistency is poor.
5. Avoid Low-Price Traps
- Market Price: The cost of Grade A ternary lithium cells is about \(1.5-2/Wh. If a battery pack is far cheaper than this (e.g., a 10Ah 48V battery pack priced below \)700), it is likely Grade B/C or recycled cells.
V. Clarification of Common Misconceptions
- "The larger the capacity, the better": Capacity false labeling without considering consistency and cycle life is meaningless — 10 Grade A 2000mAh cells are far more durable than 10 Grade C 3000mAh cells.
- "Ternary lithium is definitely better than lithium iron phosphate": Ternary lithium is suitable for scenarios pursuing long range, while lithium iron phosphate is ideal for safety-focused and high-frequency charging scenarios (e.g., food delivery bikes). There is no absolute superiority; the key lies in cell quality.
- "Fast charging does not damage cells": High-quality cells support 1C-2C fast charging, but inferior cells will accelerate degradation and even cause overheating under fast charging.
Conclusion
Other Articles
Advantages and Disadvantages of Lithium-Ion Batteries with Different Materials
Causes and Solutions for Electric Vehicle Motor Not Rotating
Precautions for the Use and Maintenance of Electric Vehicle Brake Systems
What Types of Motors Are There for Electric Bicycles?
The Core Impact of Temperature on Battery Capacity
Minimalist Guide to Electric Vehicle Battery Use in Winter
Comparison of Key Features of Major Battery Brands and Models
Commuter E-Bike Buying Guide: 5 Key Indicators Every Office Worker Must Know
I. Famous Electric Bicycle Brands in China
| Brand | Core Features | Market Positioning |
|---|---|---|
| Yadea | Ranked #1 in global sales for 8 consecutive years with a market share of approximately 26.3%. Known for graphene battery technology, offering a wide product range from high-end to mass-market. | Mid-to-High End. Global footprint with a diverse product line. |
| AIMA | Holds a market share of around 20.0%. Renowned for fashionable designs and being a Tianjin-based legacy brand. Products prioritize comfort and practicality. | Mid-to-High End. Focuses on stylish commuting. |
| TAILG | Core selling point is "energy saving and long range." Famous for its "Fire Eye Mecha" design. Annual sales exceed 8 million units. | Mid-range. Focuses on long-range commuting. |
| Ninebot | Industry leader in intelligence (phone unlocking, APP control). Highly favored by young people and the fastest-growing brand in the industry, with projected annual sales of 5 million units. | Mid-to-High End. Focuses on smart technology. |
| NIU | Pioneer in smart lithium battery scooters. Features minimalist fashion design and excellent digital experience. Performs well in the European market. | High End. Focuses on smart lithium battery technology. |
| Luyuan | Strong durability; "liquid-cooled motor" technology extends service life. A low-key evergreen in the industry. | Mid-range. Focuses on durability and reliability. |
| SUNRA | Founded in 1999 and listed on the A-share market in 2017. A manufacturer of high-end smart electric bicycles. | Mid-to-High End. Focuses on smart high-end manufacturing. |
| XDAO (Knife) | Powerful performance; the slogan "Can still run without electricity" is deeply rooted in the public mind. A Tianjin-based brand. | Mid-range. Focuses on power performance. |
| LIMA | A powerhouse in power, performing excellently in sinking markets with annual sales of approximately 1.9 million units. | Mid-range. Focuses on cost-performance ratio. |
| Wuyang-Honda | A Sino-Japanese joint venture with profound technical heritage. Products balance performance and quality. | Mid-to-High End. Focuses on quality and reliability. |
II. Famous International Electric Bicycle Brands
1. European Brands
| Brand | Country | Core Features | Market Positioning |
|---|---|---|---|
| Accell Group | Netherlands | Europe's second-largest bicycle component and accessory company, owning multiple brands such as Koga and Winora. | Full range, covering low to high ends. |
| Riese & Müller | Germany | A high-end electric bicycle manufacturer focusing on high-quality commuting and cargo electric bikes. | High End. Focuses on quality and design. |
| Cube Bikes | Germany | One of the market leaders in Europe, known for high performance and innovative design. | Mid-to-High End. Focuses on sports performance. |
| VanMoof | Netherlands | Futuristic design with smart sensors and anti-theft positioning. The top choice for urban commuting. | High End. Focuses on smart urban commuting. |
| Cowboy | Belgium | Intelligently assists based on riding style with a minimalist design, suitable for short urban trips. | Mid-to-High End. Focuses on smart commuting. |
| Silence | Spain | An expert in electric scooters, growing rapidly in the European market with an annual growth rate of about 16.4%. | Mid-range. Focuses on urban scooters. |
2. American Brands
| Brand | Core Features | Market Positioning |
|---|---|---|
| Rad Power Bikes | The largest market share in the US for electric bikes. Prices range from $1,199 to $1,999, suitable for various scenarios. | Mid-range. Focuses on cost-performance ratio. |
| Aventon | An emerging brand invested in by star institutions like Sequoia. Features modern product design. | Mid-to-High End. Focuses on fashion design. |
| Lectric | High cost-performance ratio. Folding electric bikes are popular with affordable prices. | Entry-level. Focuses on high cost-performance ratio. |
| Rivian (Also) | A subsidiary of electric vehicle manufacturer Rivian. The TM-B electric bike has a range of 160km and a top speed of 45km/h. | High End. Focuses on high performance. |
3. Japanese Brands
| Brand | Core Features | Market Positioning |
|---|---|---|
| Yamaha | Launched the world's first electric power-assisted bicycle, the PAS, in 1993. The center drive system provides precise assistance. | Mid-to-High End. Focuses on technology and quality. |
| Honda | The world's largest manufacturer of two-wheeled vehicles. Electric bicycles balance performance and practicality. | Mid-to-High End. Focuses on reliability. |
| Panasonic | Leading electronic technology with obvious advantages in electric bicycle battery and motor technology. | Mid-to-High End. Focuses on technological innovation. |
III. Summary of Brand Characteristics
- Advantages of Chinese Brands: High cost-performance ratio, extensive sales channels, intelligent functions tailored to domestic user habits. Suitable for the mass market and sinking markets.
- Advantages of International Brands: Mature technology, strong design sense, and a focus on riding experience. Suitable for high-end markets and specific scenarios (such as urban commuting and mountain biking).
Development Trends: Both domestic and international brands are developing towards intelligence, long battery life, and lightweighting, while green environmental protection has become a common pursuit.
Other Articles
Advantages and Disadvantages of Lithium-Ion Batteries with Different Materials
Causes and Solutions for Electric Vehicle Motor Not Rotating
Precautions for the Use and Maintenance of Electric Vehicle Brake Systems
What Types of Motors Are There for Electric Bicycles?
The Core Impact of Temperature on Battery Capacity
Minimalist Guide to Electric Vehicle Battery Use in Winter
Comparison of Key Features of Major Battery Brands and Models
Commuter E-Bike Buying Guide: 5 Key Indicators Every Office Worker Must Know


Detailed Guide on Enabling and Disabling Speed Limiter for Electric Vehicles

I. Basic Principle of Electric Vehicle Speed Limiter
II. Detailed Methods to Disable Speed Limiter
1️⃣ Throttle + Brake Combination Method (Suitable for Most Electric Bicycles)
2️⃣ Button Combination Method (Suitable for Models with Remote Control or Multifunctional Buttons)
3️⃣ Wire Harness Operation Method (Suitable for Electric Tricycles and Some Electric Bicycles)
III. Comparison of Speed Limiter Disabling Methods by Vehicle Type
IV. Safety and Legality Reminders
V. Practical Suggestions
Summary
Detailed Explanation of Battery Full Charging Time
Theoretical Calculation Formula
Charging Time Comparison by Battery Type
Key Factors Affecting Charging Time
1. Battery Capacity and Charging Current
2. Differences Between Battery Types
3. Remaining Battery Level
4. Impact of Ambient Temperature
5. Charging Phase Characteristics
Practical Charging Time Reference Table
Charging Recommendations
1. Lead-acid Battery
2. Lithium-ion Battery
Summary
What to Do If an Electric Vehicle Gets Waterlogged?
How to Inflate a Flat Tubeless Tire on an Electric bike
1. **Use Motor Inertia**: Prop up the electric Bike with its main stand. Turn on the ignition key, twist the throttle to the maximum to make the motor run at high speed. Once the speed builds up, squeeze the brake suddenly. Repeat this process several times. Now try inflating the tire again—this may make it easier to inflate.
2. **Seal the Gaps**: Take a few plastic bags and seal all the gaps between the tire edge and the wheel hub to prevent air from leaking out of these gaps during inflation. Then use an air pump to inflate the tire; it will inflate quickly. After the tire is inflated, remove the plastic bags and add a little more air to top it up.
3. **Elevate the Tire and Tap It**: Prop up the vehicle so that the front tire is suspended. Once suspended, use a hammer or a board to tap the tire, reducing the gap between the tire and the wheel rim. Then proceed to inflate the tire.
4. **Remove the Valve Core**: If none of the above methods work, the gap between the tire and the wheel hub may be too large, or there may be other issues. In this case, you can remove the valve core, then use an air pump to inflate the tire— the tire will slowly inflate. After it inflates, stop, reinstall the valve core, and then add more air to the tire to reach the proper pressure.
5. **Use Lubricant**: You can spray a small amount of lubricant on both sides of the tire. Then try inflating it again; this may make inflation easier. It should be noted that if a tubeless tire is flat for a long time, it may cause the tire and wheel hub to stick together or result in other damages. Before inflating, it is best to check the condition of the tire and wheel hub first to ensure safety.
The number of charge-discharge cycles of lithium-ion batteries can generally reach about 500-1000 times; some high-quality lithium-ion batteries can even achieve 1000-1200 charge-discharge cycles, with a service life typically ranging from 3 to 5 years. Currently, mainstream electric vehicles adopt lithium-ion batteries (such as ternary lithium batteries and lithium iron phosphate batteries). Compared with traditional lead-acid batteries, they have higher energy density (200-300 Wh/kg), longer lifespan (1000-2000 charge-discharge cycles), and lighter weight (only 1/3 of that of lead-acid batteries).
The number of charge-discharge cycles of lead-acid batteries is usually around 300-500 times. Specifically, low-grade lead-acid batteries have about 300-400 charge-discharge cycles and a service life of approximately 1.5 years; mid-grade graphene lead-acid batteries have around 500-600 charge-discharge cycles and a service life of 2-3 years; high-grade lead-acid batteries have about 1000 charge-discharge cycles, and it is feasible for them to be used for 3-4 years.
| Battery Type | Charge-Discharge Cycles (Times) | Service Life (Years) | Supplementary Core Advantages |
| Mainstream Lithium-Ion Batteries | 1000-2000 | 3-5 | High energy density (200-300Wh/kg), lighter weight (1/3 of lead-acid batteries) |
| High-Quality Lithium-Ion Batteries | 1000-1200 | 3-5 | Higher upper limit of charge-discharge cycles |
| Low-Grade Lead-Acid Batteries | 300-400 | 1.5 | Low cost, but shortest lifespan |
| Mid-Grade Lead-Acid Batteries (Graphene) | 500-600 | 2-3 | Longer lifespan than ordinary lead-acid batteries |
| High-Grade Lead-Acid Batteries | Approximately 1000 | 3-4 | Longest lifespan among lead-acid battery categories |
The charging time of an electric bicycle depends on several factors, including battery capacity, charger power, battery type (lead-acid/lithium-ion), and remaining battery level. The theoretical analysis is as follows:
If you have any new ideas or suggestions for our products, please feel free to contact us at any time. Welcome friends and customers to visit our company.